
Mail Merge With Google Docs: It’s Easier Than You Think
When you need to send a message to a large group of people, one-to-one communication just doesn’t cut it.
Sure, handwritten notes or personalized emails are thoughtful, but if you’re sending the same message to hundreds (if not thousands!) of recipients, the carpal tunnel just isn’t worth it. To speed up the process, you can use a mail merge instead. With a mail merge, you can easily send wedding invitations, save the dates, business promotions, or flash-sale notices without the headache, time commitment, or stress of one-to-one communications.
With a mail merge, you can take a single email template and customize it to hundreds of different recipients. By inserting various fields (such as first name, job title, organization, or their address) you can give a mass email a personal touch, while saving you dozens of hours of work.
Below, we walk you through how to create a mail merge using Google Docs. There are two primary ways to go about this: the easy way and the hard way. We’ll walk you through the most strenuous way first, before showing you a simple tool that can cut your workload in half.
How to Create a Mail Merge Google Doc — the Hard Way
Below, we show you the traditional way to create a mail merge using a Google Docs document. This process can be incredibly tedious and time consuming (but sit tight, we’ll show you a better way in the next section).
To start your mail merge, you’ll need to create two documents. To keep things organized, it’s advised to keep these two documents stored in a single folder within your Google Drive account.
- A Google Sheet: This document will contain the contact information for all of your subscribers. Each column header will feature a different merge field that you want to customize (for instance, their first name and email address).
- A Google Doc: Your Google document template will contain your form letter, which will pull individual cells from your Google Sheet data. Within this letter, you’ll use brackets to pull populated fields from your Google Sheet (for instance, you’ll write Dear <<first name>> in the salutation).
From there, you will create and run an app script that maps your fields from your Google Sheet into your Google Doc. Typically, you can do this from a Google add-on tool or though the Google API console. Unfortunately, unless you are a developer yourself, this process can be extremely difficult.
Once you run your script, you can export your completed letters via PDF, into a Microsoft Word Doc, or copy and paste it into an email. If you’re copying into an email, you will write <<email address>> into the “To” field, thereby pulling email addresses from your Google spreadsheet. Otherwise, you can copy and paste email addresses into the BCC field of your message.
How to Create a Mail Merge Using Google Docs — the Easy Way
Now, there is a much simpler way to send mass emails using Google apps. To easily send a mail merge using Google Docs, follow this quick tutorial:
1. Install the Gumbamail Plugin
Gumbamail is a free tool that allows you to send mass emails through your existing Gmail account (both personal and Google Workspace — formerly GSuite — plans). Simply download the plugin, then follow the prompts to sign in and give access to your inbox.
2. Create Your Email List

Unlike other tools, you don’t need to create a Google Sheet of contacts in order to send your e-blast (although you can, if that’s the route you choose to take). With Gumbamail, you can send mass emails to your existing Gmail contacts, or you can import new contacts via a .CSV Excel file or Google Sheets.
Once you know who you want to send your message to, you’ll create a new list in Gumbamail. In the Gumbamail right sidebar of your screen, click “Lists” then “New List.” Click “Recipients,” then select whether you want to add subscribers from a .CSV file, Google Sheet, or Google Contacts from the drop-down menu near the left side of the screen.
3. Create Your Campaign
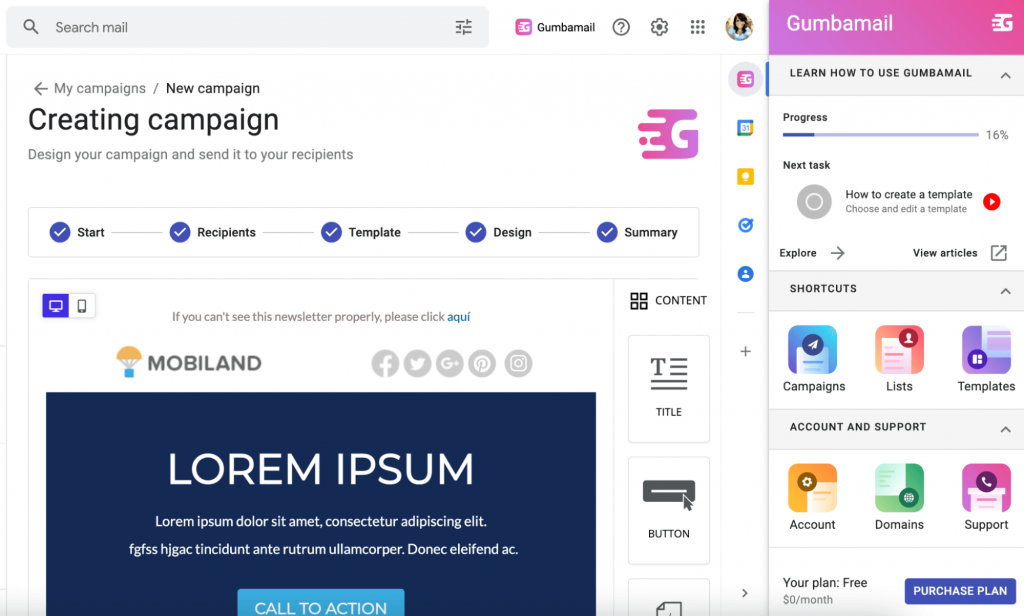
To start writing your message, you don’t need to create a separate Google Doc. In fact, with Gumbamail’s Gmail mail merge tool, you don’t need to create a separate mail merge document at all!
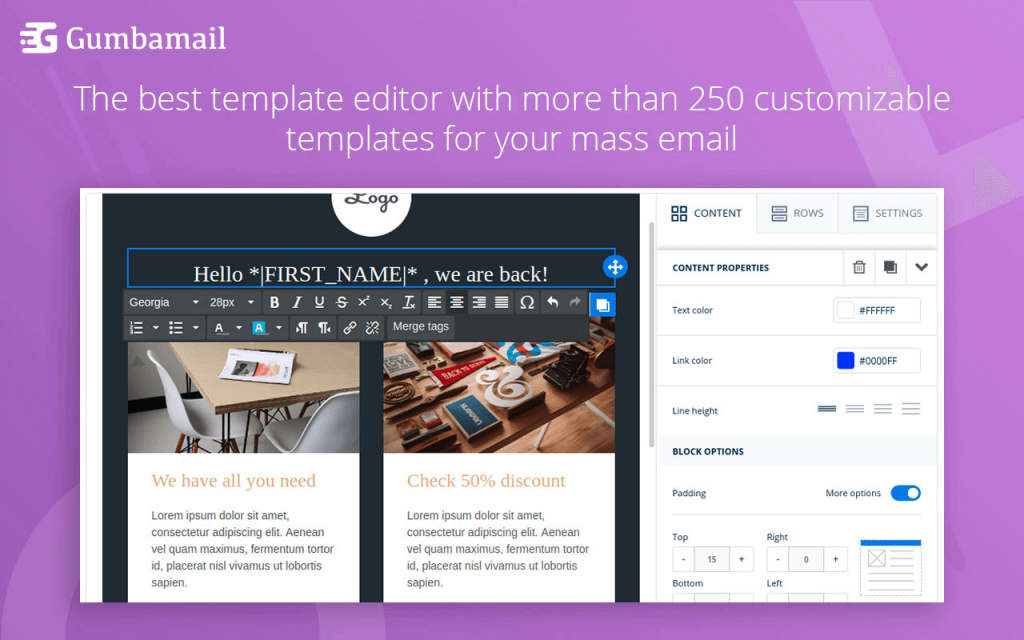
Instead, click “Campaigns” in the Gumbamail right sidebar. From there, click “New Campaign,” giving your message a title and subject line. Select your recipients (from the list you created in step #2), then select an email template. Gumbamail offers over 800 gorgeous email templates to choose from, allowing you to easily add your own style or branding to your message.
4. Personalize Your Message
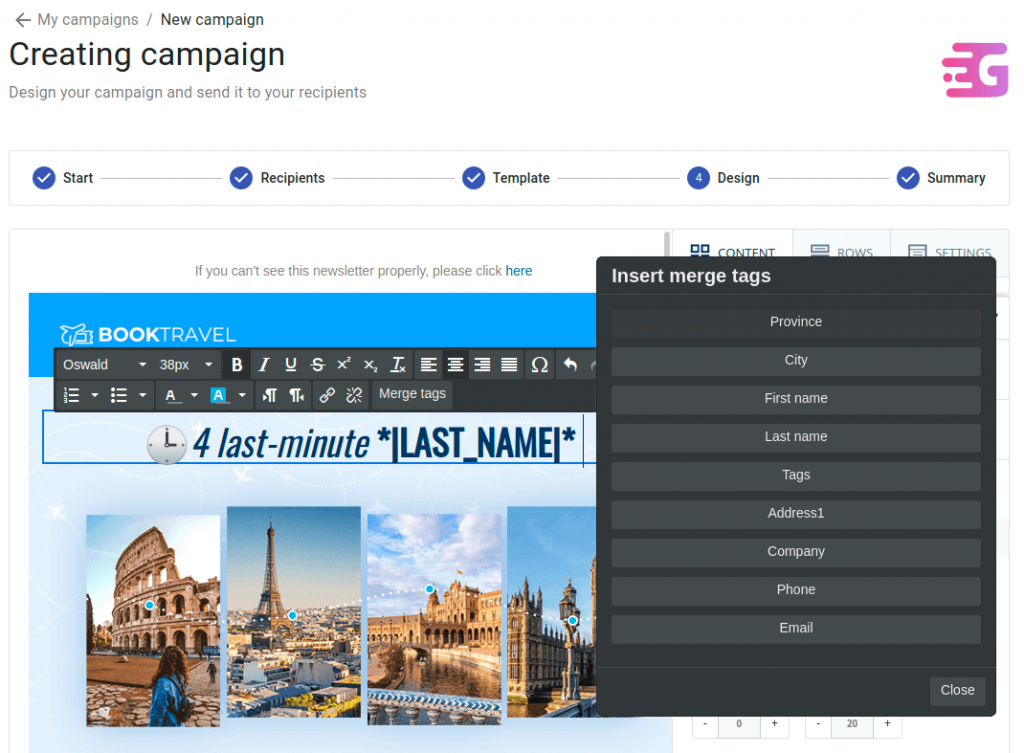
After you’ve chosen your template, you can start writing your message. Change the placeholder text to the message of your choosing, using merge tags whenever you want to personalize the text.
Note: Mail merge tags will automatically populate when you are using the text editor (see screenshot above). When you click “Merge Tags” you’ll see a list of tags created when you imported your subscriber list. Once your email is sent, these tags will be automatically populated with each subscriber’s unique data.
5. Test Your Email Message
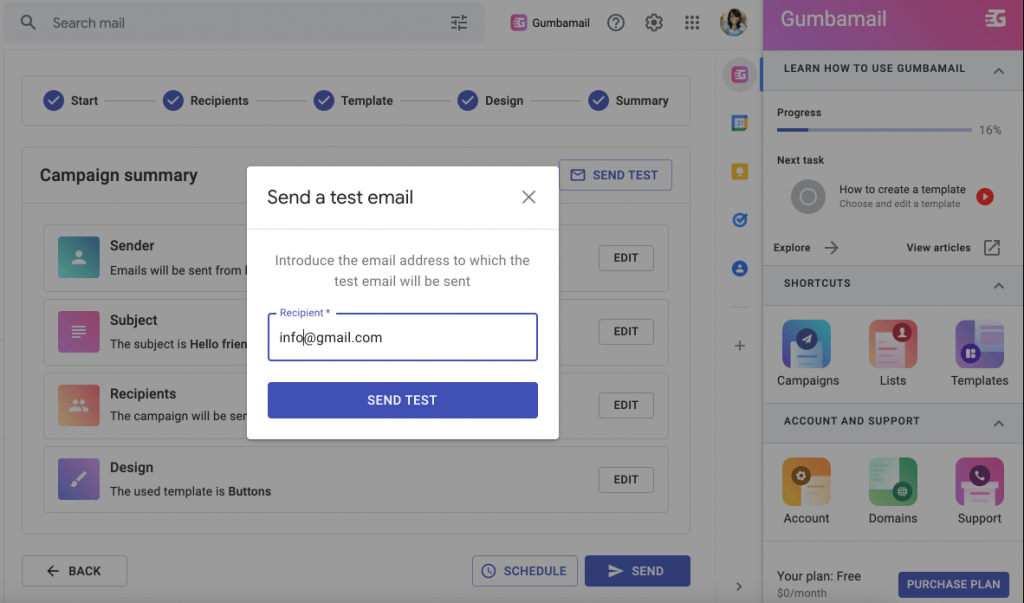
Before you send your email, send yourself a quick test email. That way, you can do a final proofread of your message, and see exactly how your message will appear in a subscriber’s inbox.
6. Send Your Email or Schedule it for Later
Finally, it’s time to send your email. With Gumbamail, you can choose to send your message immediately or schedule it for later.
When scheduling your email, try to send it when readers are most likely to be checking their inbox. Research shows that emails sent during weekdays around the mid-morning mark have the highest open rate.
7. Track Your Message
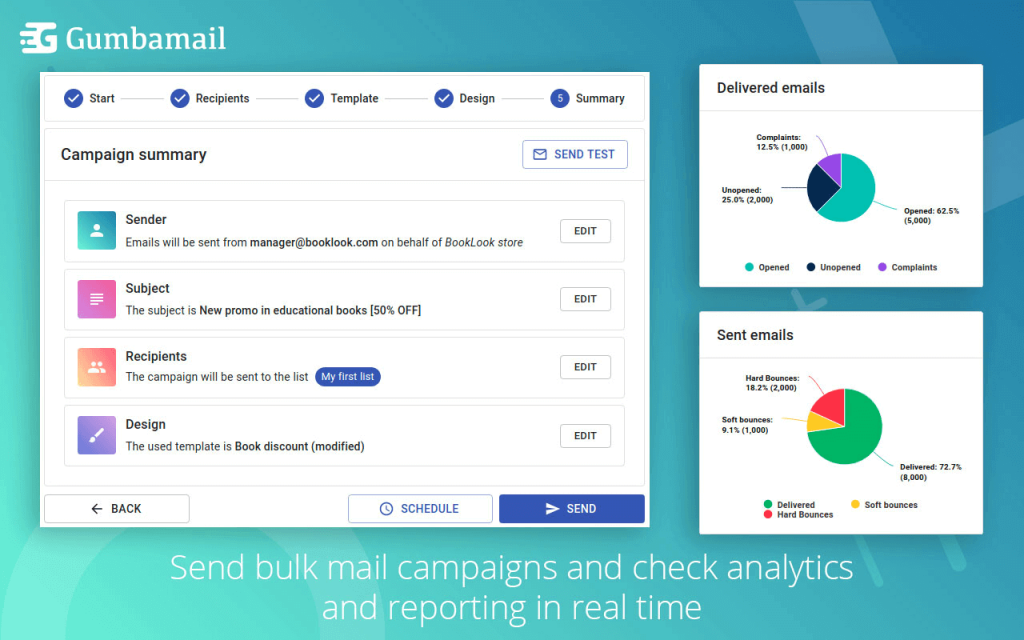
With many Google Docs mail merge tools, you’ll send your message then (im)patiently wait for a response — all while silently praying your message was delivered. With Gumbamail’s built-in reporting features, there’s no guesswork. Instead, you know exactly who received, opened, or clicked your message.
Remember: Use these metrics to your advantage. For example, if a week goes by and you realize several individuals haven’t opened your email, you might want to send a follow-up message.
Use Gumbamail to Send a Mail Merge Using Google Docs
A mail merge is a handy tool to send a personalized message to a wide group of people. For years, individuals and businesses alike have used the mail merge process to send out invitations, promotions, or holiday cards.
Today, you can create a mail merge using Google Docs, sending bulk emails from your existing Google account. Unfortunately, many step-by-step instructions found online are incredibly confusing, and force you to run scripts that would be difficult to write if you don’t have a developer background.
To create an incredibly easy mail merge workflow, download the Gumbamail plugin. Gumbamail is a Chrome extension that works with your existing inbox, allowing you to send personalized messages to a large group of people. With Gumbamail, you can create unlimited merge tags to tailor each message to the individual, then select from 800+ templates to design your message.
Ready to see how easy it is to send a mail merge with Gumbamail? Download the free plugin to get started.